Friday, December 30, 2011

2012 New Year's House Resolutions

With three out of our four Christmas celebrations out of the way, we start to reflect on 2011 and look forward to 2012 with even more excitement. Max is more excited since he's sure the world won't end next December. I'm still a tad bit skeptical but thanks to NASA I feel a little better about it. Might buy some supplies just in case people get crazy for a day or two. Anyways, a little reflection.


At this time last year, Max and I were just randomly thinking should we resign our old lease or start entertaining the idea of buying a home. I had no idea we were in for such a crazy adventure this year. We hooked up with the buyer's agent in March and by May owned our home!

Then all things we accomplished in a year. Wowza!
Here is a vast, but definitely not complete list, of some our projects:

- Bought a new refrigerator and had many issues including cabinetry and store mishaps
- Got a roommate, then he moved out
- Replanted Hosta
- Planted a "garden"
- Took seven trips to Sears to get a working lawnmower
- Redid most of our master bedroom in a weekend
- Refinished the bedroom's hardwood floor
- Painted and trimmed both bedrooms
- Completely tore down and rebuilt both bathrooms...ugh just thinking about it
- Took out a wall in the living room
- Painted part of the living room (formally spoken of as the dining room until we decided on the eat-in kitchen space)
- Started composting, still working on getting Max fully on board with it
- Got crafty
- Got to experience all of Mr. Fix-It-Mark's full throttle forward work ethic
- Replaced all the hallway doors with fancy white ones
- Found some great furniture deals at Goodwill, Salvation Army and estate sales

Quite a list for just randomly thinking, "maybe we should buy a house" a year previous!

At our "family" Christmas dinner with just Max and myself, we brainstormed everything we wanted to get done this year. This might be a little ambitious but worth trying.

1. Re-do our lawn and landscaping. 
Sounds simple enough, right? Well there is a lot we need to do with this beast.

- Regrade our front lawn. Although we like the humor of our Halloween gravestones this year, year round, it looks like a hot mess.
- Remove thorny corner bush and plant something a little more attractive.
- Add more plants/bushes throughout front yard. Maybe look into Stein's professional landscape design.
- Replants new flower beds. All of our current ones are over grown and not cute at all.
- Research better urban gardening techniques to prevent lettuce "trees".
- Install invisible dog fence for Turk.

2. Make a patio.
We love to grill, but right now we are limited to huddling around a tiny grill in our driveway. Not ideal.

- Research most cost-effective building materials (brick, stained concrete, pavers, ect.).
- Purchase new grill.
- Create privacy panels so our neighbors aren't raining in on our party, unless we invite them of course.

3. Finish painting all upstairs walls.
Pretty self-explanatory but we still have the hallway, kitchen and half of the living room to do yet.

4. Refinish all our hardwood floors.
This includes our second bedroom, hallway and living room.

5. Redo a piece of furniture every 1.5 months.
This is sort of a personal goal since I don't foresee Max refinishing furniture, but I keep hauling in great pieces but not touching them. So I want to finally start making them look like they actually belong here.

6. Start putting artwork and photos on the walls.
Again, self-explanatory but this place is really bare and we need to start looking like we live here.

So what do you think? Achievable? What are your house resolutions for 2012? Big plans?

I leave you with a fun YouTube video I found of Zooey Deschanel and Joseph Gordon-Levitt - What Are You Doing New Year's Eve?


Side Note: I immediately went and watched (500) Days of Summer again after seeing this video. Comic source here.

Friday, December 23, 2011

From Our Home To Yours

Here at The Parkland Project, we wanted to wish you all a very happy holiday season (whatever you celebrate!) For us it is Christmas. 

If you were luckily enough to be on the actual mailing list, this is what you might have found in your mailbox. If you were not, step your game up(jk)! We just wanted to share the holiday spirit with all our loyal readers. This year's card design came from cardstore.com, where I got a 60% discount code I couldn't pass up. They are gorgeous cards too with a matte finish. Really impressed!


A few people have asked why Turk didn't make the card. Well he has been naughty and he wanted to be on his own card.


We're off to the family's for Christmas Eve and Christmas Day and have our other Christmas celebration over New Year's. Should be a blasty blast!

Merry Christmas everyone!

Thursday, December 22, 2011

Christmas 2011 Decor

I usually go way over board with Christmas decor as it is, my favorite holiday. But this year to my dismay, when I brought up the decor boxes I had from our old apartment, I found out we clearly did not have enough to fill a whole house festively enough (at least to my standards).


Being on a limited budget, I had to pick and choose where to spread out what I could buy and what I could make. Let's start with the make projects.

I found this tall skinny artificial tree at Goodwill for $6.99 when I was shopping for Halloween not know what I would do with it. Normally, I never have a good place to stick holiday cards, but not this year! You are looking at the "Card Tree". Decorated only with a vintage tree topper my mom gave me years ago from her childhood and some Dollar Tree ribbon from a previous year, I have just been adding the cards as we get them.


For each of the "ornaments" I have just been taking a hole punch and then tying a string through. These are pre-made ornament hangers.


This whole post I was playing with the settings on my camera with low light and changing ISOs so bear with me if some of the images are a tad blurry. I have no tripod.


Here is a close-up of Max's sister, Molly's family in "ornament" action. Isn't his niece, Claire cute!


The next project I had was none of our stockings had any names attached with them. I had bought them at Menards last year but never got around to labeling them. This year I used scraps from my burlap and linen and some extra ribbon and made us matching tags. All just with the hot glue gun.


Here they are in action. Since we have no mantel of any sort, I hung them using 3M removable hanger hooks in white to blend in with our living room windowsill. I have used them before and they really are great. Come off any wall without a scratch and hold up to three pounds of weight. In order they go (l to r), Maureen (me), Max and Turk.


Turk even posed next to his.


Since I have already shown you the ornaments I made for the Christmas tree, lets me on to her. And she really does look like a fancy lady this year. I used some more of the longer pieces of burlap for garland and some other beaded garland to counter balance the rustic with the sparkly. 


The last few years I had not really had a proper tree topper and was using ribbons to complete our little 6' tree. This year, I upgraded to this rustic beauty that incorporates the red of the tree, the rusticness of the sticks and the white covered balls are mimicked in the round LED lights we have.


Here is a view of just the ornaments and garland so you get the whole picture.


This ornament has been on every tree since the year I was born. My grandfather gave it to me back in 1982, that same Christmas, he died of testicular cancer. I never got to know him but its a great way to honor his memory. The ornament says "Christmas... season of magical moments." and the bunny is there because apparently that was his nickname for me. His "little bunny".


Around the house, I filled random vases with ball ornaments from previous tree years. This one is silver and red.


Are ya sick of tree photos yet?


This one is my favorite. It's the perfect balance of light, ornaments and presents.


The reason I do all this. My boys.


Around the doorways of the living room I added evergreen garland from Menards, $2.99 a strand, on sale. This entry way took two strands.


I used one of Max's TKE fraternity pitchers from formal in college and filled it with silver and red balls as well. Their colors.


Here are my Christmas trees from here nestled in with my wood antelope from the estate sale. Its a nice little forest.


 '
The JOY letters are kicking next to a photo of my parents since they bring so much JOY to my life (cue the "aww").


My Dollar Tree Santa candy jar is ready by the front door for visitors.


Back in the kitchen, I have a "Merry Christmas" banner I got last year from Target for $3.00. Maybe next year I'll make more banners for the holidays.


The dining room table is decked out in my burlap table runner from Thanksgiving (the project that started all the burlap), my Target place mats from last year and large green and white balls in a vase.


Some of the outdoor lights I couldn't seem to find the proper place for this year made it inside the house on top of our cabinets giving off a little bit of ambient lighting.


My festive holiday kitchen hand towels take center stage.


So what do you think? Over done? Not enough? Great ideas? Eh, ideas?

AHHH! I LOVE CHRISTMAS!

Wednesday, December 21, 2011

Holiday Craft Bonanza

Sorry to be M.I.A. for a few weeks but in my defense, I contracted a horrible case of pink eye that needed two different prescriptions to clear it up. Yowza! Not sometime anyone wants. But while I was out of commission, I did a little holiday crafting.

I'm not much for crafting but with the money saving aspect of it, its really growing on me. I used to say I was more "artsy than craftsy" but now I'm starting to think they sort of go hand in hand. Its just how you "corral the creative". Here is what kept me sane while I was home alone for a weekend (Max went on a hunting trip) with pink eye.

Project #1: Linen Ornaments

I wanted to upcycle some old glass mismatched ornaments I have had for quite a few years and make them useful again. I bought a cream linen fabric remnant from JoAnn's for approximately $3. Then cut them into about 6-7" strips about a 1/4" thick. Making sure I had enough to cover all my ornaments.


Here you can see about how long they are. I used a smaller ornament bulb. If yours are larger, use longer strips.


Using my trusty glue gun, I then dabbed the center of the strip with glue and draped it up the sides of the ornament. Secure the strip in a few more places up the sides leaving the top open. 


Here are what the ornaments looked like before I trimmed their tops, sortof like little onions.


Then just trimming the excess fabric off close to the metal topper, I secured those ends down make sure none of the color from before showed.

Here is the final product.


Project #2: Burlap Covered Ornaments

Reusing some of the same box of old mismatched ornaments, I took some of my burlap scraps saved from my Thanksgiving table runner to make these little guys. Inspired from this pin, I tweaked my ornaments a tad bit to accommodate the fact my burlap was a lot looser weave.

Using a similar technique from the flowers on my NFL Packer wreath, I cut up the burlap into approximately 1"-2" squares.


I pinched each piece into a small bunch and dabbed a bit of glue on the end of the bunched fabric. Then I secured it to the ornament. 

After repeating the process all over the ornament, this was the final result.


Project #3: Painted JOY Letters

This was by far the easiest project. I found that they still had some of those letters leftover at JoAnn's from my "A for Anderson" that I have on our living room bookshelf on super clearance for $0.97 a pop. So going down the over picked options missing some letters for NOEL, I came up with JOY! Yes I know, who wants to battle this Scrabble player?

I first did a quick coat of my Rust-oleum primer on both sides and the bottom of the letters. No I did not spray this in the house, just a visual for you kids.


Then using acrylic paint, painted each letter red.


Three coats later...


DONE.

Project #4: Linen Covered Christmas Trees

So I started this project while doing the ornaments, came back to it later and changed my mind. I originally was going to make them burlap covered, but with my wide weave burlap, I though linen might look better. That is why there is an inconsistency with my my photos. For you, any festive fabric will do!

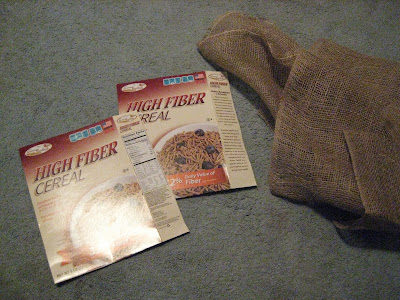
First, I cut the front and back off of an old cereal box leaving the side tabs on. This is the base for the Christmas trees. You can use any pliable scrap piece of cardboard.


Tightly wrap the boxes in to a cone form.


I used plain packaging tape to secure the cardboard pieces together.


 Don't worry if the edges are a little messed up, you'll be covering them with fabric anyways.


I slightly pinched the cones and cut in a straight line to give the cone a flat surface to rest on. Any warps in the bottom will bevel out like this one did. Just cut it off.


Then I was left with these beauts.


Using the same linen remnant  from the ornament project, I wrapped the cones using the straight edge of the fabric first. I secured them with the hot glue gun. This left the raw edge out giving the cone a little more definition. A little more glue and it looked like this.


I cut around the bottom leaving a little space for the edges to get folded and secured with the hot glue gun under the cone.


Here is what it looked like after it was glued. A few pieces of the fabric underneath puckered but no biggie since no one see that part.


Then it was time to decorate! I bought a few different types of ribbon from JoAnn's $1 bins and ended up only using one roll.


The one I wrapped the ribbon in a criss-cross pattern. The other was in an alternating striped pattern. I added a couple of draping bows to give them a finished look.


What sort of holiday crafts have you conquered?

Related Posts Plugin for WordPress, Blogger...